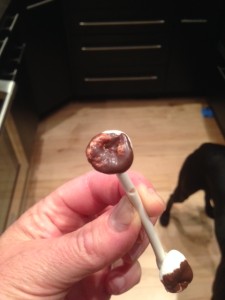
Halloween Treats- Gross Earwax Marshmellows (gluten free)

This is a great, gross, gluten-free idea that I found on Pinterest but decided to modify. In that version, a marshmallow was cut in a triangle and put on the end of a toothpick. I thought

img_8666

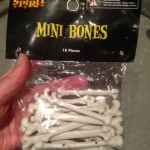
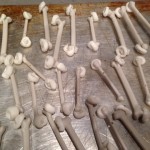
Bags of plastic bones

that was OK, but why not upgrade it? I went to the Halloween store (Spirit Halloween) and purchased two packages of small bones for $3.00 each. I then used my Ghiradelli chocolate used for melting and once I affixed the small marshmallows to either end of the bones, dipped them in chocolate.

Walla!

img_8669

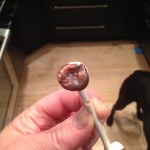
bones with the marshmallows attached. You can see I basically pushed the marshmallows on the ends, which were helpfully curled. you have to be fast about this, because they start to harden, and you want the chocolate on before they turn crusty!

See the pictures. BTW- this also doubles as a game. The bones have two holes. String some fishing line in between and suddenly you h

img_8670

after dipping in chocolate.

ave a game that kids, or raucous adults can play–as in, eat the marshmallow off the line first without it falling to the ground. (I’d recommend you confiscating iphones before you do this however. It gets pretty silly).


Storage
Refrigerate (on parchment paper) because the chocolate will stick to a regular pan. Even then, be careful when you lift it off, because the chocolate/marshmallow may slide right off the bone. This happened probably 10% of the time so it wasn’t big deal.

Store in an airtight container for up to 3 days. Beyond that they taste stale.


Halloween Treats- Gruesome Ripped Ears

img_8697

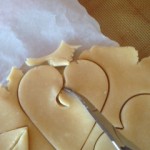
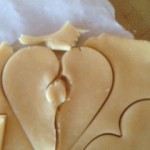
after using the heart-shaped cookie cutter, take your edged knife (this is a pastry/fruit knife) and make a curl that will make the form for the inner ear. carry it all the way down

img_8691

The finished product

This is my other divinely gruesome treat. Ripped ears. It is made from the same dough that is in my recipe for Witchy Fingers. Since I’m sure you’d hate popping back and forth, I’m putting it below. This is far easier to create and form the ears–so once again, don’t be intimated. Let your inner spooky-self flow as you create these.

Requirements
Food coloring and a small paintbrush
If you have it, a heart-shaped cookie cut-out will make your life a LOT easier. If not, you can use a round one and modify it. OR, you can free form with a sharp, non-serrated edge knife.

Ingredients- Dough
2 large eggs
1/4 teaspoon pure vanilla extract (bourbon or Madagascar are my preferred choices)
8 tablespoons (1 stick) salted/sweet butter (not unsalted. The taste is SO much better this way)- room temperature

img_8698

this is what it will look like after. make sure to take eat the center circle:)

1/2 cup confectioner’s sugar (powdered sugar)
5 tablespoons granulated sugar
Pinch of salt (I tend to use Himalayan pink salt as it gives the recipe a pop), and when it says “pinch” I use my grinder, and that means 3 turns of the grinder
1 2/3 cups of all-purpose flour


Directions
Separate 1 egg. set aside the white in a bowl.

In a small bowl, which together the yolk, remaining egg and vanilla. Set aside.

img_8699

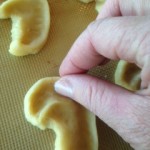
mold and shape the ear using your thumb and forefinger. Before this, I will typically pick it up and work it in my fingers for the basic shape, then put in on the Siplat cooky sheet and get it a little better.

In a large bowl (like a KitchenAid), use the padded attachment and combine the butter, powered sugar, granulated sugar and salt. Beat on medium speed until well combined. Add the egg mixture and beat until smooth, about 2 minutes. Add the flour, mixing on low speed until just incorporated (over mixing makes the end result hard).

Wrap the dough first in parchment paper if you have it, the plastic. If you have neither, an airtight Ziploc bag will work. Chill until firm, 20-30 minutes.

Making the ears

Divide the dough into two halves. Put one half back in the fridge to keep it cold.

Roll out to be @1 cm thick. If you are going to err, make them a bit thicker. If the dough is too thin, it will tear and you have to start all over (e.g. chill, roll out then form).

img_8700

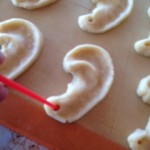
using the end of the paintbrush (or a toothpick) create a hole to represent an earhole (so you can make it black or colored later)

Use the heart-shaped cookie cutter. Using a knife, make a basic ear (see the pictures). Lift one side out, then start to form the ear. The key technique here is to use the thumb and forefinger to create the ridges of the outter and inner ears. The bottom lob can be modified, but again, don’t make it too thin or it will rip and not hold its shape.

Tip: as with the witchy fingers, if you are going to ERR, do so on the side of overexaggeration. It’s better to have an ear that is thick and has form than one that’s too thin and doesn’t hold a shape.

Once this is done and the ear if formed, take the edge of a knife (I use a pastry end that has a ridge for texture) and make some ‘cut-lines’ in the inner ear–which is actually the ripped part.

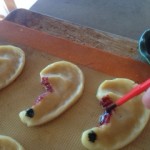
Painting the ears is really the easy part. First, color the holes. This does nothing more than make it look ‘ear-like’ and gorey. The next painting is on the inner ear, the part that’s ripped. Play around with this. Brighter red makes the blood look fresh while darker blood (red mixed with some blue or green) gives it an older, burnt look.

The both taste great!

img_8701

food coloring in a little pie dish (I use these micro pie dishes that are only about 2 inches across) for convenience

Tip: wait for a few minutes before you brush on the egg white, and AVOID the painted parts, trying to get along the edges and in the depressed area.

Bake at 350 degrees for 8-10 minutes. You should underbake these little because you’d rather have them moist than dry. They hold for 3 days in an airtight container. After that, they simply don’t taste that great.

img_8704

painting the inner (ripped) ear

img_8705

sometimes, after baking, the ear will raise, and you will want to counter this by using the edge of a spook or whatever is handy an press down along the inner ridge. This will give the ear the best shape possible. It holds, so you only have to do this once.


Halloween treats- Witchy Fingers

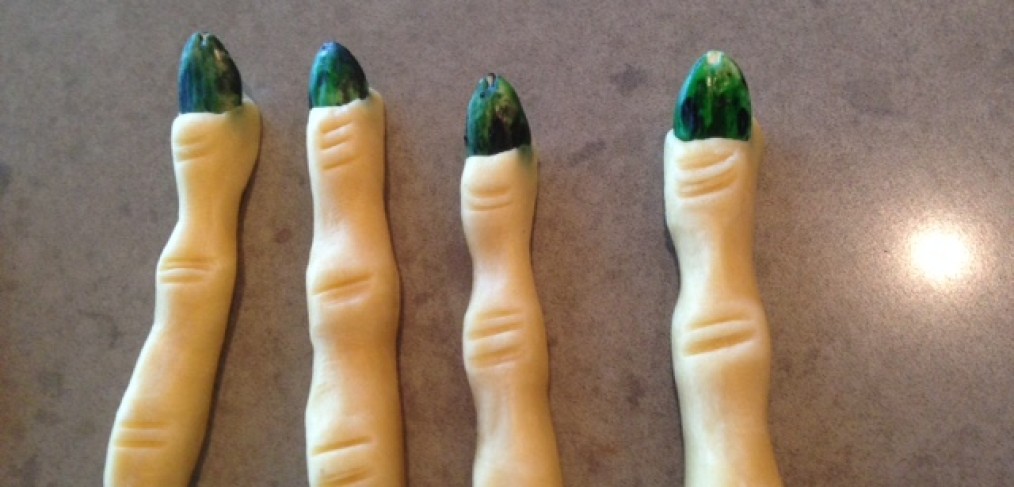
One of my two, personal favorite bite-size treats. The other is the gruesome ripped ears. Both of these are divinely gross and absolutely delicious. They are also made from the same dough. The only difference is the witchy fingers are cooked longer while the ripped ears are slightly undercooked. I might also add that these take a bit of time (about an hour and a half) but are great to do with kids. They are also big attention getters, which I also like!

Promise- people get intimidated by the nails (the almonds) and creating the actual fingers. This is super easy. My motto is: if I can do it, so can you. I’ll give you step by step pictures on this. You can do it!
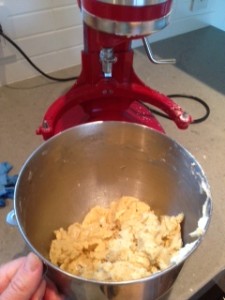
img_8673

Took a picture to show what “just incorporated means.”

Requirements
Food coloring. A box will give green, yellow, red and blue. You will use all but the yellow.
A knife, rolling pin, and small paintbrush (to color on the blood and moldy ear slice).
Parchment paper

Ingredients (first, the nails)
Food coloring – you will use this last
30 blanched almonds

Directions
In boiling pot of water, dump the almonds. You may want to do more than 30, just in case a few split.
After 1 minute (exactly) remove and strain. Immediately run cold water (from the tap) is fine. Only need to do this about one minute.
Dump on a paper towel. As you start to rub the almonds, the peels will come off. Not all though–perhaps not even half. Don’t worry. With your fingertips (thumb and forefinger) you can easily rub once or twice and the shell slips off.
Place the blanched almonds on the cookie sheet (this is where you will paint them once fully dry)
At this point, stop and make the cookie dough. The reason is you will need to refrigerate the cookie dough. As this happens (about 30-40 minutes or longer) you will paint return and paint the fingers.

Ingredients- Finger Dough
2 large eggs
1/4 teaspoon pure vanilla extract (bourbon or Madagascar are my preferred choices)
8 tablespoons (1 stick) salted/sweet butter (not unsalted. The taste is SO much better this way)- room temperature
1/2 cup confectioner’s sugar (powdered sugar)
5 tablespoons granulated sugar
Pinch of salt (I tend to use Himalayan pink salt as it gives the recipe a pop), and when it says “pinch” I use my grinder, and that means 3 turns of the grinder
1 2/3 cups of all-purpose flour

Directions
Separate 1 egg. set aside the white in a bowl.

In a small bowl, which together the yolk, remaining egg and vanilla. Set aside.

In a large bowl (like a KitchenAid), use the padded attachment and combine the butter, powered sugar, granulated sugar and salt. Beat on medium speed until well combined. Add the egg mixture and beat until smooth, about 2 minutes. Add the flour, mixing on low speed until just incorporated (over mixing makes the end result hard).

Wrap the dough first in parchment paper if you have it, the plastic. If you have neither, an airtight Ziploc bag will work. Chill until firm, 20-30 minutes.

Tip: For rolling out, divide in half. The reason is simple. It takes time to roll, parse (or separate) the individual dough pieces for fingers. then you must roll, detail and place the finger. The remaining dough will get too soft, and become gooey. So take out only as much as you can reasonably use before it gets warm, which is about half.

At this point, place the dough in the fridge and paint the fingers.

Painting the fingers
place red, green and or blue food coloring in separate bowls. holding the almond between fingers, paint both sides. Tip: I use a rubber glove so I don’t stain my fingers. It takes several days to come off and I hate that. Then again, it is Halloween so who cares? Let stand until you are ready to roll out the dough and make the fingers.
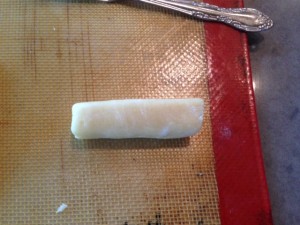
img_8677

this is the dough, already rolled out, then cut and formed into a 2-2.5 inch piece

Making the fingers
This fun. Don’t be worried. Just put on some good chill music and go for it.

Take half the dough and place the other half back in the fridge. Roll it out to @1 cm thick. Using a cutting utensil (I use a pastry spatula), cut the pieces into a manageable size (e.g. about the length of half a real finger. It will elongate as you roll it out.

Roll the dough out into @a 3-inch piece. Then using your forefinger and third finger, depress a little, which will raise the middle (to create the middle knuckle). Adjust the end tip, to resemble the end of the finger. Adjust as necessary– e.g. raise the center, depress the in-between parts (as they will raise slightly during baking).
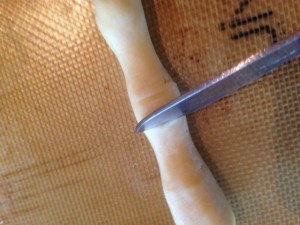
img_8683

depress the center. this makes the knuckles. 3 simple lines will do it

Take one of the almonds and wedge it within the end. Don’t place on top, as this will ensure it falls off after baking (I’ve done this before and ruined the whole batch). Make sure you have a bit of dough above, below and on all sides.

Take a knife or other untensil and create the ridges for the knuckle. Walla! you have created your finger.

Tip: Create the entire batch of the fingers and then brush lightly with the egg white. If you do this too soon, you will depress the ridges on the knuckles and it won’t look that realistic.
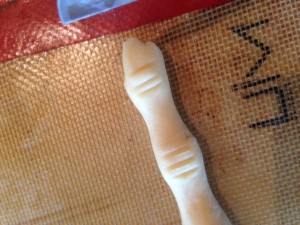
img_8684

now you are ready place the almond as the fingertip

Tip: Err on the side of exaggeration. In other words, if the ridges and length of the fingers aren’t pronounced enough, the finger will come out basically smooth. So if you are worried, its better to have a finger that’s super bony rather than one that looks flat and normal. You don’t want normal!

For cooking
Heat the over to 350 degrees. Line two baking sheets with parchment paper or Silpats (French non stick baking mats are my preference).

Using a non-stick brush, brush lightly with egg white.
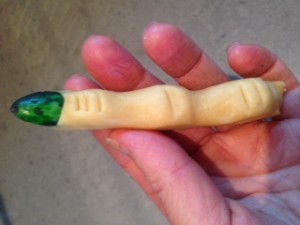
img_8674

this is what it looks like before its cooked. you can add as much dough around the edge as you want. for fun, I sometimes go back and make them scraggly, but it tends to gross people out then they won’t eat them!
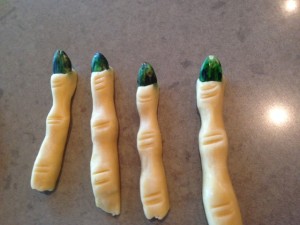
img_8675

This is a row PRE- covered with egg whites. I forgot to take a picture of that, but they slightly glisten when covered with the egg white
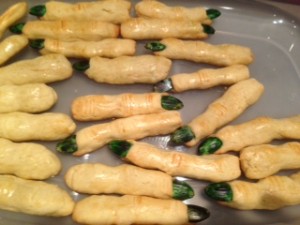
img_8690

this is a pic of just the green-tipped ones. This year I made red, green and then black.

For the presentation, my favorite way to display for eating is sticking out from within a cauldron. That way they are reaching out to you, saying EAT ME!


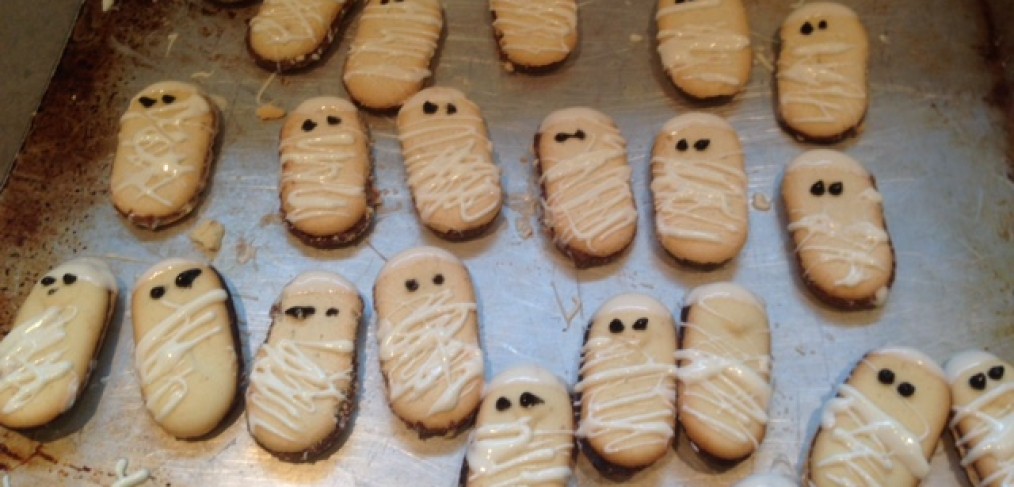
Halloween Treats- Mummy Milanos

Easy. Fast & delicious.

Requirements
Milano cookies (every grocery store has them). Tip: get the dark chocolate. Every stinking time I get the milk chocolate, the inside is crumbly and the milk chocolate tastes old. Clearly, people prefer the dark chocolate. It holds up better and is fresh. And yes, this is a IRK.
Milk chocolate especially made for melting. I use Ghiradelli. It is fresh, melts well and delicious.
A spoon or knife (to drizzle the chocolate)
Either chocolate icing (with a tip) that can be had for @$2.50 at most stores

Ingredients
1 package Milano cookies
1 package Ghiradelli white melting chocolate
1 container chocolate icing (or little chocolate speckles for the eyes)

Tip: do NOT use the gel icing sold in the stores. I used this and it doesn’t dry, even after four hours in the fridge. They smudged when I tried to layer them. Next time I went for the fast-dry icing.

Directions
Arrange the Milano cookies on a cookie sheet.

Melt the chocolate according to the directions. Short version is place the white chocolate in a microwave-proof bowl. Heat for 30 seconds. Every 30 seconds, stir. It will melt. By minute 2, it will be completely melted.

Immediately dip the end of your spoon or knife in the end and drizzle according to your desire. Before the chocolate dries, add the sprinkles. If you are using the icing, wait until the chocolate dries before applying.


Best Caramel Apple Dip

After many attempts to perfect this recipe, I’ve yet again mutated it into a dip that gets completely devoured at parties. The reason is it’s not “too caramelly,” which is a way of saying the caramel is overpower. Personally, I hate things that are overdone, which is what the original recipes is. This isn’t. It’s perfectly balanced between the caramel, cream cheese and marshmellow. For those people (e.g. men) who claim to hate cream cheese, they can’t even tell. As in, my husband Roger, hates the divine, bovine created product. Even he loves it. This recipe is a winner.

Requirements
A beater with a three-pronged paddle. The creamcheese need to be room temperature (softened, but not warmed in a microwave. I’ve done this and it curdles the product, ruining it).

Ingredients
1 package (8 oz) cream cheese. tip: on this, don’t go light. go full cream cheese. the consistency is much better and creamier
1/2 cup packed brown sugar (dark has richer flavor, but I prefer the light brown)
1/2 cup caramel- I hate the liquid, ice cream topping this calls for. Most versions have a horrid aftertaste. Go for the kind in a container. it’s very thick and can be found an most all grocery stores.
1 teaspoon vanilla extract
1 cup marshmallow crème
3 medium tart apples
2 tablespoons lemon juice
2 tablespoons water

Directions
In a small bowl, beat the cream cheese, brown sugar, caramel topping and vanilla until smooth. Fold in the marshmallow crème. Cut apples into vertical thin slices–I actually use my fun, holiday cookie cutters just to be different.

In a small bowl, combine the lemon juice and water. Toss the apples in the lemon juice mixture. Drain. (it prevents the apples from turning brown).

Tip for serving: you have a lot of fun options for making a simple dip look impressive. You can:

a) drizzle some caramel on the top
b) add nuts of any type to the top
c) put paprika on the top (don’t use Hungarian Paprika though. it’s too strong and will give a weird aftertaste whereas regular paprika won’t).

Lastly, on the color and flavor. If you want a darker look, simply add more caramel. This will enhance the flavor. Adjust to taste.

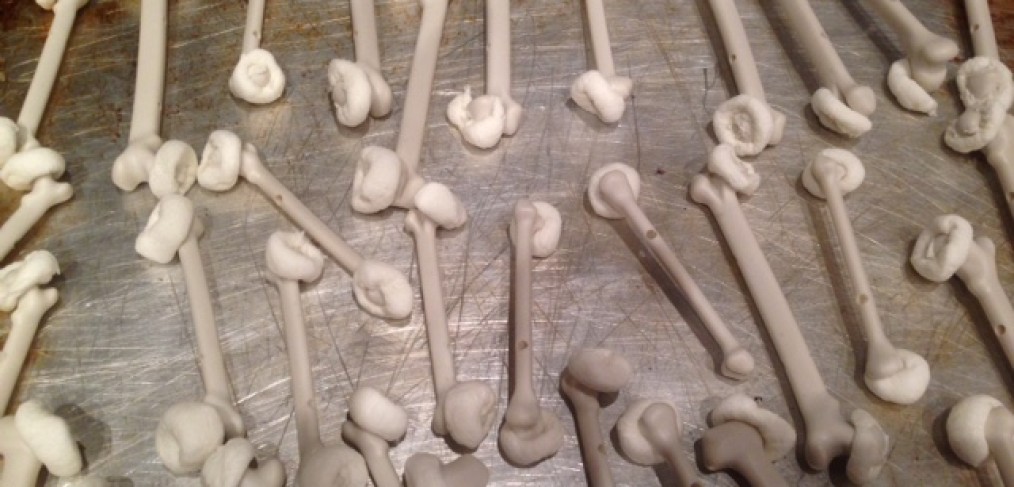
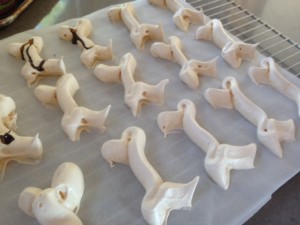
Halloween Treats – Meringue Bones

A light weight, gluten-free party favorite for all ages is bones. I’m talking meringue bones. It’s simple, fast and impressive. Most important, it doesn’t require a fancy icing tip. As a backdrop, I’ve tried a number of recipes from major sites, and I hated all of them save one, and even that, I modified. The following has a basis in the recipe from fishieking on allrecipes. My first round, I didn’t totally like the consistency of the bones (too mushy both in the better and final outcome). I increased the amount of cream of tartar just a hair and it was perfect.

Tip: make sure the Cream of Tartar (its a spice, just in case you haven’t heard of it), is within the expiration date. The first batch was ruined, and I looked at the culprit, which turned out to be 6 months overdue on the expiration. The next batch made with a brand new bottle turned out normally.

Requirements
Egg beater, big Ziploc plastic bag, parchment paper to line the cookie sheet.

Ingredients
6 egg whites (room temperature)
3/4 teaspoon cream of tartar
1 pinch salt
1 1/3 cups white sugar
2 teaspoons vanilla extract (I used bourbon or Madagascar vanilla. it makes a huge difference)

Directions
Preheat oven to 225 degrees F (110 degrees C). Line 2 baking sheets with parchment paper (I prefer this to the tinfoil in the original recipe. it’s less sticky)

Beat the egg whites with cream of tartar and salt with an electronic mixer until egg whites are foamy. Gradually beat in sugar, a few tablespoons at a time, beating until the sugar dissolves in the meringue before adding more. Continue beating until the meringue is glossy and forms sharp peaks. Add the vanilla. At this point, the batter should be very gloppy (a technical term of course).

Spoon the batter into a Ziploc or pastry bag.

Tip: when I read this direction, I thought great. Reality is that I use a large KitchenAid mixer and couldn’t hold the bowl, and the Ziploc and spoon the stuff. I enlisted my husband, who held the bowl as I used a spatula to slide the batter into the bag.

Cut the end of the tip with a scissors.

Tip for formation of the bones.

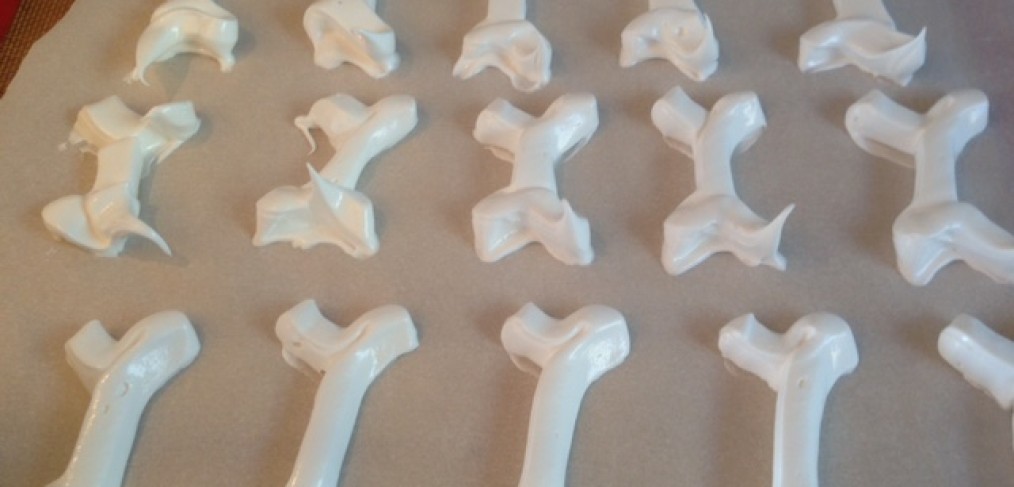
Start at the upper left hand corner, draw down to the bottom of the V. Then go up to the right of the V. Quickly take the tip straight down for the long center. Then draw down for the lower left, then up to the base V then down to the lower right. Lift up the tip.

I made a few testers, which necessitated me changing the grip of my bag. It’s easy enough to push out, but half-way through, the bag will deflate and air bubbles will collect. To prevent this, stop, open the bag, squeeze out the air then resume.

img_8652

Meringue bones – gluten free party favorite

Key directions for cooking

Place the cookie sheets and bake for 1 hour. Do NOT open the oven door, not even to peek. I ignored this part of the directions (thinking it wouldn’t make a difference. It did. They flopped). So, lesson learned. Leave it shut for an additional hour. (seriously. do not skip this).

When removing the bones, slide off the parchment paper onto a rack. Wait until cooled, then place in an air tight container.

Tip for storage

The original recipe didn’t give any commentary on storage, but I read that they could be sealed, room temperature for several days. I made one batch on Tuesday, thinking they would be fine for Saturday. Well, I checked on Thursday, and they’d become really brittle. By Friday, they were falling apart at the touch, with the exception of a few of the thicker ones. That meant I ended up creating a new batch, which I served the following day.

Pictures show the formation and the outcome.

By the way- I had these on a “gluten free” table, but all the guests had them- adults and kids (about 50 total). They were the first to go!

Halloween kid games (but work for adults)

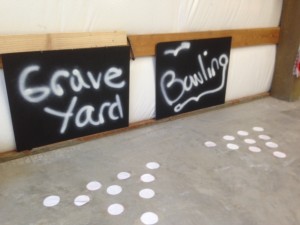
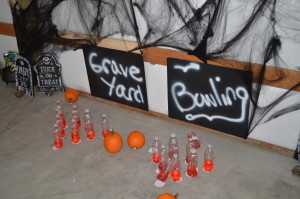
Graveyard bowling

Graveyard bowling

Fourthings to do that work equally well for kids and adults, because really, when it comes to Halloween, adults revert back decades, dress silly, act sillier, and generally have no shame when it comes to what happens in the darkened rooms of a Halloween party.

Graveyard bowling

All you need is an empty space about 10 5-8 feet long. Carpet works, as does cement or wood. What you need:

  1. A sign. Pumpkin bowling. $3 bucks for the black cardboard. white spraypaint. tacks.
  2. old water bottles, 1/3 full of water and red food coloring (strip off the label).
  3. round, white cut outs on taped to the floor. 10 of them.dsc_0907
  4. smallish pumpkins.

Place the bottles on the floor. Behind the bottles, tack the cardboard. Walla. You are done. I was surprised how many adults wanted to play this bowling game. It was hilarious.


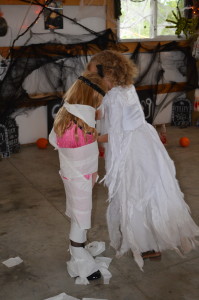
Mummy wrapping

This was a party fav two years ago with the kids & the adults had so much fun I ddsc_0901id it again. It’s easy. Teams of 2 or 3, and two rolls of toilet paper. One package from Costco means 2 rounds of ten-give or take, so the teams of two can each hav a chance to wrap and be the mummy.

Toss the finger & eat the earwax

This is easy, but unfortunately I don’t have pictures of the former and only one of the latter.

Tossing the finger means you get a bucket (we have a cauldron) and set it about 10 feet away from the kids (in a line) and they toss 3 fingers. The one to get all three wins the prize. Adults do this to. The cauldron can be on the piano, side-stool, inside or out. You’d be surprised how few people can get the finger in (or eyeballs work) in the cauldron!

img_8670

Earwax on a bone

The second game is awesome! This came about when I saw this Pinterest idea for earwax on a stick. I modified the idea by purchasing bones at the Spirit Halloween store (25 for $3.00). I then took a small marshmellow and stuck it on both ends of the small bones. After than, I melted Ghiradelli milk chocolate and dipped the ends in the chocolate. It looks like brown earwax…so grossly awesome. The game came about because the bones came with two small holes. I was able to run string (I used fishing line) through it, then hung the bones. The kids were able to see how many they could eat without the ear wax falling on the floor. Adults are way more grossed out on this game than the kids–no telling why.

Look for the recipe and other info on the earwax which doubles as a treat in other blogs.