Preventing varicose veins

Back in Sept of 2010 when I wrote about remedies for reducing and eliminating ugly varicose veins, I should have written a section about prevention. Silly me. In my defense, I was trying to keep to She’s comment about the 5 paragraph blog which is the bane of my existence. I’m more writer than blogger, and not so good at that, but I digress on what my readers already know.

I had the uncommon good fortune to have a friend whose family was in the circus. Literally. Three generations of performing with Barnum & Bailey’s traveling circus. What, might you ask, does this have to do with vericose veins? Everything, for it was my friend’s mom bit-o-wisdom that I largely credit with keeping the snake-like demons of ugliness off my legs.

One afternoon, while we were inside their round house, which resembled a four-story high hobbit home (as in, hand-constructed and earthy, more like a mountain than a residence for humanoids, we were having a chat. I was watching my friend’s brother flying around in the trapeze in the center of the room, their practice space. The father was in his wheelchair (he fell without a net) years before I met the family, and my friend was harnessing the belts on her waist. As usual, I was in awe of the graceful, lithe bodies that swirled above me, commenting on keeping a beautiful physique. Somehow, the conversation turned to legs, the mom’s in particular.

“Just don’t cross your legs,” she said, something my mother had also told me. “It’s the most important thing you can do.” She went on to point out that men who cross their legs always have a lot of red marks and bumps above their knees. “And do you notice the women? They have red marks on the top of their thighs from the hours and days of weight on their legs.” She then lifted her calf to show where the pressure on the lower leg creates spider veins.

As a teenager, I took her words to heart, never, ever, crossing my legs. It was hard to sit sideways, knees touching, as the others looked far more compely, sitting with their gams crossing, ankles touching delicately in perfect posture form. As an adult, I struggled to look refined as men and women in business meetings crossed and uncrossed, as much to make a statement as to be comfortable. Not I. I kept the faith, just as I did for not wrinkling my nose, raising my eyebrows or raising my forehead in order to stave off deep lines (that worked!).

Years later, as women of my age started getting saline solution injections or having their veins removed, I have been fortunate to do neither, but have used the horse chestnut oil I mentioned in the earlier blog.

Is it the floors?

Quite a few women I now hang with are firm believes that the floors they stand on have assisted in the maturation of veins. Hard floors, particularly in the kitchen (slate, tile etc) are considered the culprit by many. I can’t say either way, since I have slate and have been standing on that for a dozen years now. Several women have ripped up their floors and put installed bamboo floors or cork. The bamboo is supposed to be quite soft, and the cork feels bouncy in a weird sort of way. It’s an interesting look (not for me) but works well in the right setting.

Teenagers reading this….don’t cross your legs, exercise, and adults, give your feet a rest and keep the horse chestnut oil handy.

PS the last time I saw my friend, she was getting shot out of a canon as I watched in Entertainment Weekly. Yes. people do live that life.

Thick & Rich Pork Chops & Gravy

My cooking zone, complete with two science projects in front
of the cookbook

Pork chops don’t have to be hard, dry or tasteless. After years of failed attempts, I found a great recipe that has been my go-to for all things pork chops for years. It’s easy to make, provided the you do things in the right order, and above all, use good ingredients, starting with the pork chop. I made the (mostly American mistake) of choosing meat that’s overly lean. Had I listened to my dad’s admonitions to “keep in the fat! It gives it flavor!” my results probably would have been much better. 

One of my most often-made vegies. String beans cooked in
organic vegetable or chicken broth. Quick, easy and flavorful

First off, the pork chops. Pick out nice, thick chops, not thin. You will waste your time.  My preferred cut is a 1.5-1.3/4 inch cut of pork chop. I typically make 4 at a time, since the chops I get are so huge, I typically share with someone else in the family. (Surprisingly, Costco has a great selection of thick chops, (for beefy American’s no doubt) but they aren’t organic or natural. When I go to the butcher, I have to request the thickness.

The rest of the ingredients are straightforward, though as usual, I recommend sweet, salted butter and sweet, Walla Walla onions.
Overview
The recipe essentially comes from The New Best Recipe, though I have made some changes as usual. It’s called Smothered Porkchops, for indeed, it is smothered, but this is what keeps it moist and flavorful. What you’ll be doing is flash-frying the pork chops in a butter/onion base while making the thick and rich gravy. You re-add the porkchops back into the main pan, cover and cook for a bit. You have the most divine pork chops and gravy to hit the planet. While this is cooking, you roast the red potatoes and make the string beans. 
Pre and Cook time- @1hr 10 min

Ingredients
3 oz (abt 3 slices) bacon, cut into 1/4 inch pieces
2 tablespoons unbleached all-purpose flour
1 3/4 cups low-sodium chicken broth

I used a cast iron press to speed up the bacon and
even out the cooking

2 tablespoons vegetable oil (I split this with butter)
ground black pepper
2 medium size sweet onions, sliced thin (I make mine very small)
Salt
2 tablespoons water
2 medium garlic cloves, minced or pressed through a garlic press
1 teaspoon minced fresh thyme leaves (dried is ok)
2 bay leaves
1 tablespoon parsley (fresh or dried)

**note: I’ve actually cut down the cook time about 5-10 min by doing a few of things slightly out of order. The gravy is supposed to be made after the pork chops are done, but I make the gravy first, thereby smothering the pork chops in true southern fashion.

Directions
1. Fry the bacon over medium heat and brightly, rendering the fat, about 8-10 minutes. Using a slotted spoon, transfer the bacon to a paper towel and reserve, leaving the fat in the pan (you should have about 2 tablespoons. Add vegetable oil if you don’t).
2. Reduce the heat to medium low and gradually whisk the flour into the fat until smooth. Cook, whisking frequently, until the mixture is light brown, about the color of peanut butter, about 5 minutes.
3. Which in the chicken broth in a slow, steady stream; increase the heat to medium-high and bring to a boil, stirring occasionally. Cover and remove from the heat; set aside.
4. Heat 1 tablespoon of the oil in a 12 inch skillet over high heat until smoking. Meanwhile, sprinkle the pork chops with 1/2 teaspoon pepper. Brown the chops in a single layer until deep golden on the first side, about 3 minutes. Flip the chops and cook until browned on the second side, about 3 minutes. Transfer the chops to a large plate and set aside.
5. Reduce the heat to a medium and add the remaining 1 tablespoon oil, the onions, 1/4 teaspoon salt and the water to the now-empty skillet. Using a wooden spoon, scrape up the browned bits on the pan bottom; cook, stirring frequently, until the onions are softened and browned around the edges, about 5 minutes. Stir in the garlic and thyme and cook until fragrant, about 30 seconds. Return the chops to the skillet in a single layer and cover them with the onions.  Pour in the reserved sauce and any juices released by the pork chops; add the bay leaves. Cover, reduce the heat to low, and simmer until the pork is tender, about 30 minutes.
6. Transfer the chops to a warmed serving platter and increase the heat to a medium-high and simmer the sauce rapidly, stirring frequently, until thickened, like a gravy.

Red potatoes
Ingredients
Potatoes
Olive oil
Salt and rosemary

Directions
1. Dice the potatoes in quarters, drizzle oil, add salt and rosemary. Toss and place in a convection oven at 400 degrees. Cook for approximately 5-8 minutes then remove, scrape and move the potatoes. Return to the oven for another 5-8 minutes.
2. Remove and serve warm or cool.

The caramel color of the flour

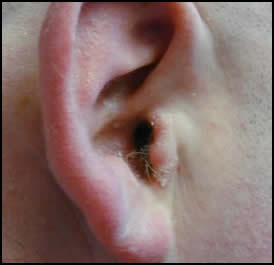
Dry Ear Remedies

One of the fringe benefits of taking up martial arts was the youngish, hot-looking instructor on staff during the times I found most convenient. I was married of course, he single, and about a decade and a half too young even if I had been of the four-legged, mountain-dwelling type of feline, but still the motivation of impressing the young man increased my determination to complete a V-sit up, learn to flawlessly execute rolling knuckle push-ups and stand in a lung poster longer than I thought humanly possible.

The impossible dream of him ever glancing my way for a comment other than to push in my hips or keep my elbow up higher when lifting a sword during a down thrust was dashed when, during a break, he asked if I’d been out in the sun. I responded that no, it was Seattle in the winter. Of course not. Why do you ask?

“Your ears are really dry.” With that, I slunk out of the studio as fast as decorum would allow, cursing my Swedish roots to the edge of the land from which we came. Why me? Why my dry ears?

It’s not like I hadn’t known about my dry ears for oh, say, twenty years already, since I’d hit puberty, nor had I used every method, tip, trick or remedy to rid myself of this evil malady. But no. It’s with me, like my long legs, thick hair and fat, cow milking hands, the progeny of my generations of Scottish cow farmers I’m sure (Vikings conjures a more flattering image, but I lack the prerequisite red hair).

Thankfully, I’d forgotten this ego-reducing incident until I had my hair back in a baseball cap and my 6 year old brought it up. “Mom, why do you have dry ears?” Off goes the cap, down falls the hair, covering my offensive, though perfectly shaped ears and I wonder…why can’t we all be perfect? Would it have been so hard for God to have extended his love from the outer edge of my ear to include the inside? It couldn’t have required more than a nudge fingertip to give my inner lob the moisture it needed.

Until this unanswered question of the universe is answered, I must rely on man to solve the problem. First, why?

Dry Skin on the Ear CanalSome common reasons include…bad hygene. People who don’t bathe more than a few times a week get the dry, crusty film. Over bathing can cause a similar result, since the oils on the skin get washed away and the surface becomes like the scalp–dry and flaky. The Mayo Clinic cites actinic keratosis which are lesions on the skin. I’ve never seen nor suffered from that. From all my research, ‘itchy’ is a common side effect, but I’ve never had a single ear ‘itch.’ This is attributed to Swimmers Ear or an ear infection and so on. All kinds of remedies are available for this, none of which apply to me.

Here’s what I’ve had and tried…(it comes and goes, like Vivaldi’s Four Seasons). During the spring and summer, my ears are mostly fine. Enough moisture, enough sun, the proper balance of both. Fall and winter, not so much. My mother hypothesized it was in line with the amount of water I consumed….

Natural remedy #1….more water and liquids. This certainly has helped, perhaps more than anything else. My scalp and skin produce similar results, why not my ears?

Natural Remedy #2… less moisture…in other words, when I shower, I must pull my hair back and get ALL the moisture off every surface of my ears. Just like my scalp, when the moisture isn’t 100% gone, my scalp goes berzerk.

Natural Remedy #3…the weekly ‘scrape.’ It sounds more disgusting than it is. We scrape our teeth two times a day (brush) we scrape our scalp by combing, we scrape our legs, faces (men) and armpits with blades, why not scrape our inner ear.

Here’s what you do. Take the end of a tweezer (mine is round and thin but not sharp) and gently run the flat edge along every area that is dry. This gets off the old, invigorates the new.

Natural Remedy #4….Along with the water, start taking Vitamin E or daily Omega 3 gelcaps. This is a long term solution–it won’t take effect for a few weeks. When I take one or both daily, my ears are nearly perfect on the inside, plus my hair is glossier and skin/nails much improved.

Natural Remedy #5 (quick fix-see tip)….Borage Oil.

Things that DON’T work. Lotions are terrible. It just turns the dry skin in to the ears version of pancake mix without the benefit. Oils are worse. The oils plus dry skin is a mushy goo, that still then needs to be scraped off. gross. The last thing that doesn’t work are Q-tips, or the soft removes. The marketing folks would have us believe pushing dry skin around is the same as getting rid of it or improving circulation. Not so.

Tip:

Now if you are completely desperate, getting ready to go out and you pull your hair back (or get your hair trimmed) and see the white dry skin, scrape it off (gently, so as to not make the skin red). Then apply a little bit of Borage oil from a gelcap. Borage is one of the beauty world’s best kept secrets. Years and years ago, I was told of a great concoction to use on my face: primrose oil, vitamin E and borage. You can find my recipe here). That’s fine for the face, but much too thick and heavy for the ears. Borage is light, and just the barest hint, when applied to the ears, will eliminate the dry and cracked look, allowing you to go out for hours and not worry about being embarrassed.